WARNING: This post has a lot of graphic butchering-related pictures. If images of butchering a chicken offend you, you should stop reading. (You might also consider becoming a vegetarian.)
What to expect your first time butchering a chicken.
I’ve always had a deep respect for animals. Growing up, my mom taught us that if you couldn’t finish everything on your dinner plate, you should eat the meat first. Something died for you to have meat on your plate.
The idea that something has to die in order for us to eat is upsetting. Most of us just block out those thoughts rather than deal with them, process them, and figure out how to accept them.
I’m not a vegetarian, and have no interest in becoming one. Yet I’ve been so far removed from my food that I’ve been regularly eating meat my entire life without ever having been part of the butchering process.
Somewhere along the line, thanks to giant slaughterhouses and e coli-factories, consumers have been totally removed from their food. We’re shielded from the death, from the blood, from the butcher. We’re shielded from the sacrifice, and we don’t care how the animals are raised, treated and killed as long as we don’t have to watch.
The animals we eat are making the ultimate sacrifice – how could I truly appreciate a sacrifice that I’ve never actually witnessed? How could I be ok with eating meat without understanding what goes into processing it? I had no clue what went into killing and butchering a chicken.
Most of my chicken-related posts are about how to save lives…how to make a sick chicken drink water…removing a stuck egg from a prolapse vent…caring for them as tiny, helpless, adorable chicks…
I felt like I couldn’t fully understand the process of taking a life unless I forced myself to be a part of it. I wanted to see it with my own eyes. I wanted to face it so I could start wrapping my brain around how to accept that an animal needs to die in our for my body to stay alive and well.
Even though I live in the city, I wanted to learn how to harvest and process a chicken in my own urban home.
The Team
“Sam – I have a weird question. If I can get my hands on a live chicken, would you teach me & a few friends how to kill and clean a chicken in my garage?” I asked.
Sam is a good friend, and he grew up hunting & fishing. He has cleaned plenty of animals. He’s killed & butchered chickens before. I knew that if I didn’t have it in me to do the deed that day, Sam is a patient and experienced person who would.
“Sure. Sounds like a satanical party. Should I bring seance candles for our sacrifice?” he joked.
“Are Yankee scented candles ok? I’ve got a few of those,” I replied, very happy to make light of the emotionally dark and scary event I was setting in motion.
“I think those will suffice. Sounds like a murder date,” said Sam.
For things that matter, like learning how take a life and clean a bird, I prefer to learn hands-on from someone experienced. The chances were high that I would cry. I would change my mind. I would get dizzy. Sam was our source of know-how, and the person who would ‘pull the trigger’.
My friends Rozz, Nora and Drew were amazing enough to join, too. None of us had chicken killing/butchering experience. This was new for us all – a hands-on learning experience and a chance to grow.
Although the meat was eaten, the main purpose of the “murder party” was for education. I wanted it documented, so I could share our evening on this blog and provide some feedback and direction from a first-timer’s perspective on butchering a chicken in a garage.
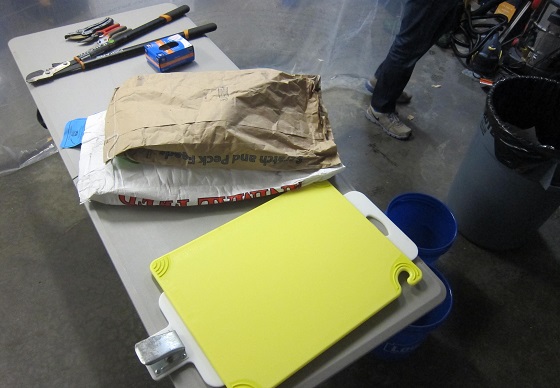
The Setup: here are tools you’ll need to butcher a chicken.
I did plenty of research beforehand (see my list of links at the bottom of this post for some GREAT chicken butchering resources if you’re a first time butcher, like I was), and after having been through the butcher process, I’ve realized that each person gets into their own groove.
Everybody does the killing and butchering a little bit different, and everybody has their own idea of what’s a “must have” tool.
If/when I butcher chickens in the garage again, here’s the list of tools & items I’ll have handy:
- Cutting board. If you’re killing the chicken by chopping its head off, you just need something that you can chop on.
- Sturdy table. It takes a lot of force to chop clean through a chicken’s neck, so you’ll need something sturdy to put the cutting board on.
- A big towel, or old feed sack. Just something to wrap the chicken in so it’s easier to hang onto the body once the chicken is beheaded (they flop around after death).
- Smaller hand-wiping towels. If you have blood on your hands from killing, then you pluck feathers, your hands will be messy by the time you’re ready to start cutting and pulling guts. You’ll want some old towels to wipe your hands.
- A killing tool. We used a large, rectangle butcher’s knife. In retrospect, it would’ve worked just as well to use a branch trimmer to severe the head. Chicken necks aren’t very thick.
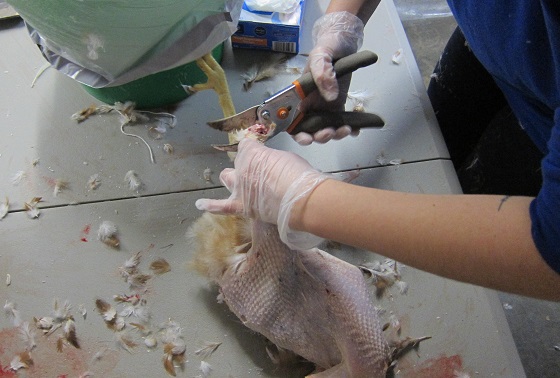
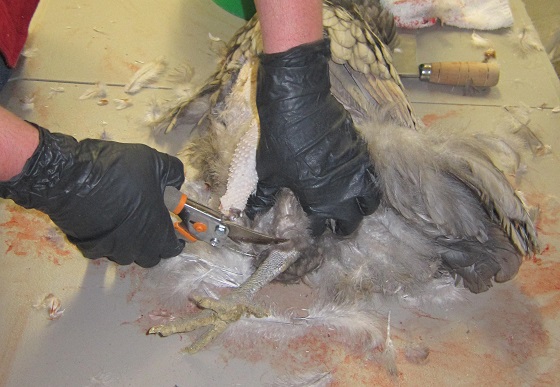
- Garden clippers. We used a pair of garden trimmers to cut the tips of the wings and the feet off.
- A smaller knife. We chose to cut off the tail, rather than completely pluck the tail feathers.
- Buckets or a big trash can. If you’re butchering in a confined area you’re trying to keep clean (like a garage), you’ll need to hold or hang the headless body over a container to bleed it. You’ll also need a place to put feathers as you pluck.
- Gloves. Gloves are totally optional. Outdoor birds can get smelly and often have bugs on them, but gloves are entirely your preference. I started without gloves, but put them on mid-way through plucking.
The chickens to be butchered
On Facebook, I’m part of a closed group that’s all about keeping chickens Alaska. It’s such an amazing resource for education, buying/selling, and sharing each other’s backyard poultry experiences.
When chickens are young, they’re really hard to sex. It’s so tough that many people and companies don’t sell pre-sexed chicks. They’re sold as “straight run,” meaning you don’t know the gender of the chicks until some start crowing and others start laying eggs.
The Municipality of Anchorage doesn’t allow roosters, so those of us who have chickens in the city of Anchorage need to get rid of our roosters once they’ve matured enough to start crowing and becoming a neighborhood nuisance.
A woman in the chicken Facebook group posted on the group’s wall, saying she had a young rooster and an old, non-producing laying hen in Anchorage, both ready for a stew pot.
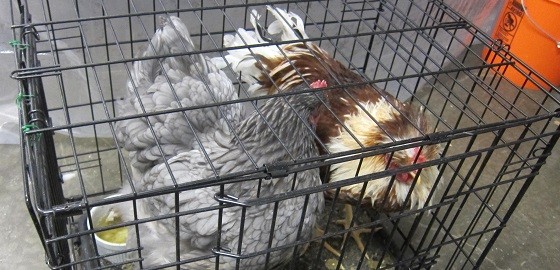
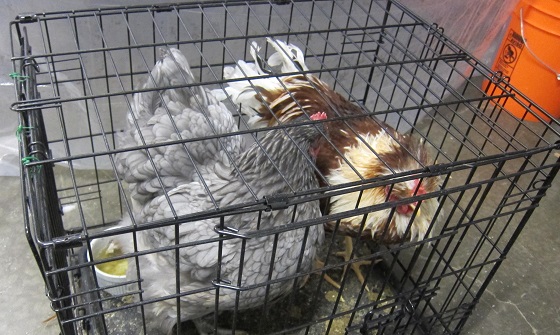
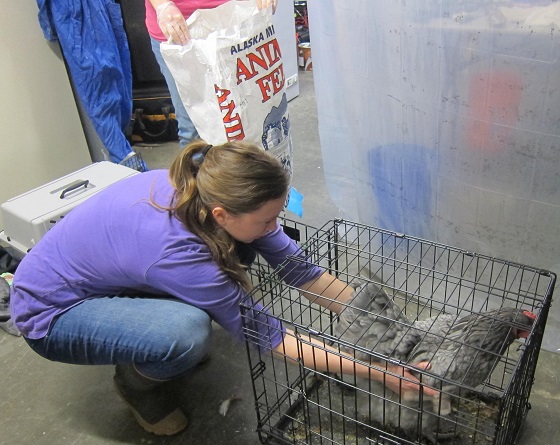
Drew and I picked them up the evening before our planned butcher, very appreciative of the donation. (The hen is the bigger chicken on the left; the rooster is on the right.)
You don’t want to feed chickens for 12 to 24 hours before butchering, otherwise their digestive tract will be full, making a very messy and challenging butcher, especially for first-timers. Only offer them water – not food.
I felt terrible withholding food during their final hours. I reminded myself over and over that these are neither the first nor the last chickens to go a day without food. I’m not torturing them. This is a necessary part of preparation leading to the butcher.
I kept the chickens in a wire dog crate, in the heated garage. It was zero degrees outside in Anchorage that day. If I couldn’t offer them food, I could at least offer them a brief stay in a 60-degree heated garage.
The hours leading up to the butcher were emotionally trying. I would be walking around the house, doing laundry, and hear the rooster crow from the garage. He sounded sad.
Watching TV, and hear the hen cooing and clucking. Mourning. Weeping.
Doing the dishes, and hear the rooster crow again, calling to me, asking me why I’m doing this.
The logical part of my brain tried to reassure me that they were just chicken noises. But the emotional, new-to-butchering, side of my brain personified each and every noise.
An hour before my friends came over for the butchering, I broke down crying. I sat in the garage, looking at the chickens in the wire crate, visually sizing them up to see if they could fit into my current flock or if they would make my chicken coop too cramped. I didn’t want to kill them. Maybe they could be my pets instead.
The little girl in me wanted to keep them – to save them from death. “You don’t need to eat these chickens,” she whispered to me, trying to give me hope. “You can just order delivery food tonight, and you’ll keep these sweet birds alive.” That’s when my bubble of delusional hope popped.
Why did my brain think like that? The chickens in the crate were clearly taken care of. I picked them up from their previous owner. I saw where they came from and how they lived. They had a good life. THAT is the meat I should want to eat – not whatever factory farm chicken that’s just one easy, fast phone call away from being delivered to me in a styrafoam box.
That hypocritical, “I can just order food elsewhere,” thought process is the whole reason I wanted to learn how to kill and butcher in the first place. It’s pretty fucked up that I would rather eat chicken that probably led a terrible, cruel existence just because I didn’t want to come face to face with the reality that eating meat in any form means taking a life.
I went back into the garage and sat down. Making eye contact with the chickens, I talked to them. I explained to them why I would be killing them soon, and what their death would mean for my personal growth and education.
I’m sure that sounds like some weird hippie crap, but it helped me. I personify animals and quickly get attached. It’s part of who I am. Talking to them – reassuring them – was part of my journey. I know it didn’t help them, and they didn’t understand me. But it was what I needed.
Killing isn’t fun. But it’s a necessary part of a meat-eater’s life that I’ve avoided until now. I wanted that to change. Now was the time.
I wiped my tears, and I reminded myself why I was in the situation with a rooster and an old laying hen in my garage. For me, eating meat means being able to make hard decisions with a swift, humane hand.
The Killing
We started with the rooster first.
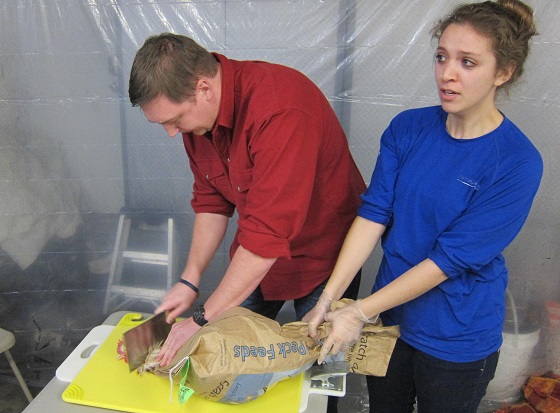
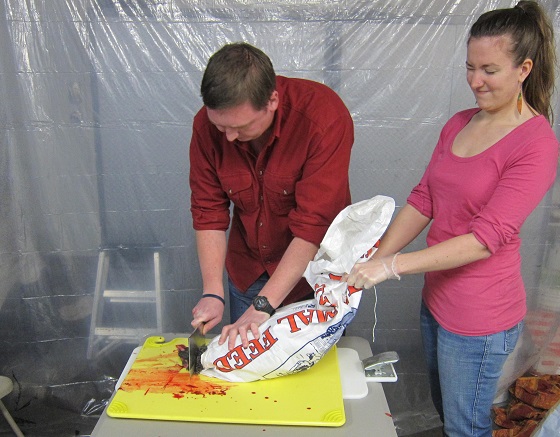
We snipped an angled hole in the bottom of one of the feed sack corners, like how you’d snip a corner of a ziplock bag to make a decorative frosting tube to write on a birthday cake.
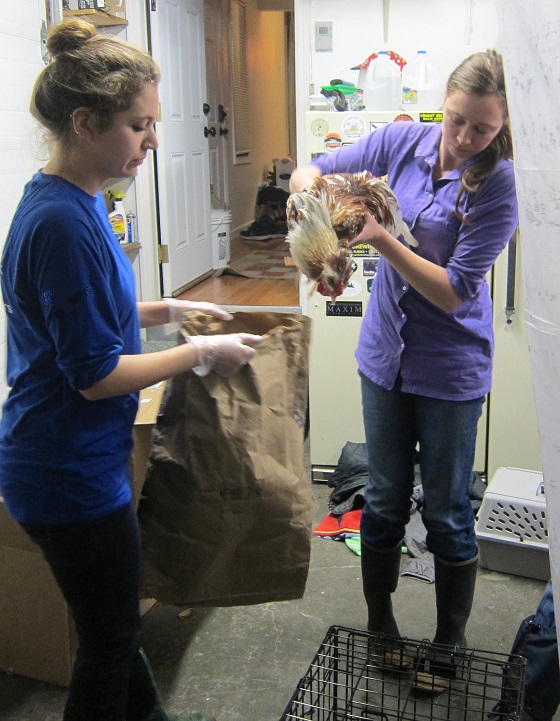
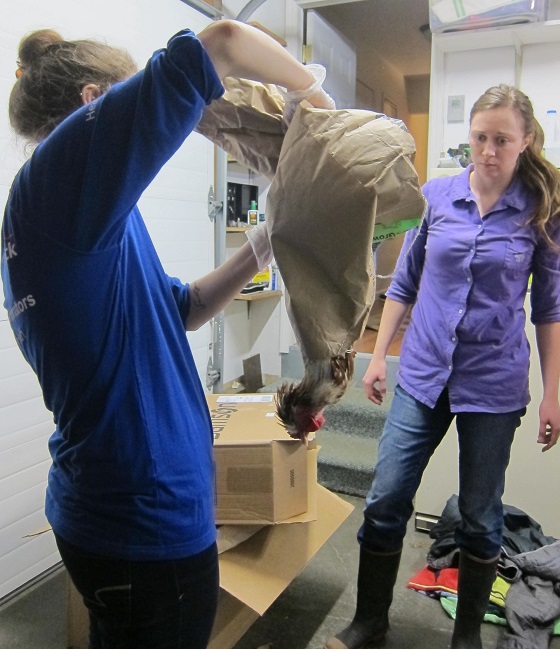
I took the rooster, holding him upside down, and eased him head first into the bag toward the hole in the bottom corner. Rozz held the bag and helped guide him in.
Once the chicken is in the bag, pull the head and neck out the bottom corner, through the hole. Any sort of bag would work. The purpose of the bag is really just to keep them restrained, so they aren’t able to flap their wings while you’re swinging a giant knife.
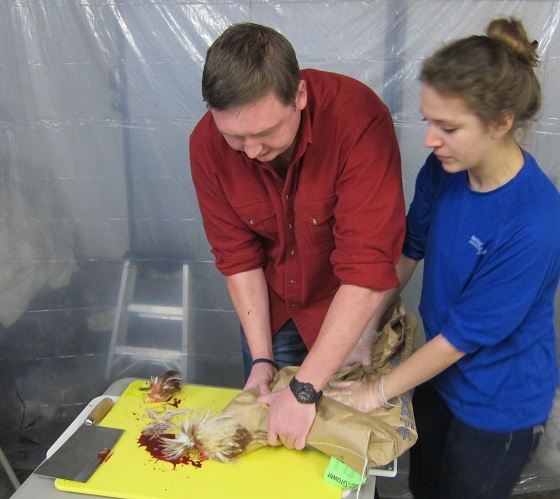
The next part happens fast. Lay the chicken down on your chopping surface, and chop the neck.
Our friend Sam did the cutting. He’s a strong guy, and it took him a few big chops to completely separate the head from the neck. It went fast and happened within seconds, but I don’t think our folding table and cutting board setup was as sturdy as it needed to be to get a clean chop in one swing.
Once the rooster’s head was separated from his body, the head continued to blink as though it was still alive for about 10-15 seconds. Honestly, it was disturbing. I wasn’t prepared for that.
The body also flaps and has sharp movements for about 30 seconds, so once the head is cut off, it’s important to not let go of the body in the bag, especially if you’re trying to keep the blood contained.
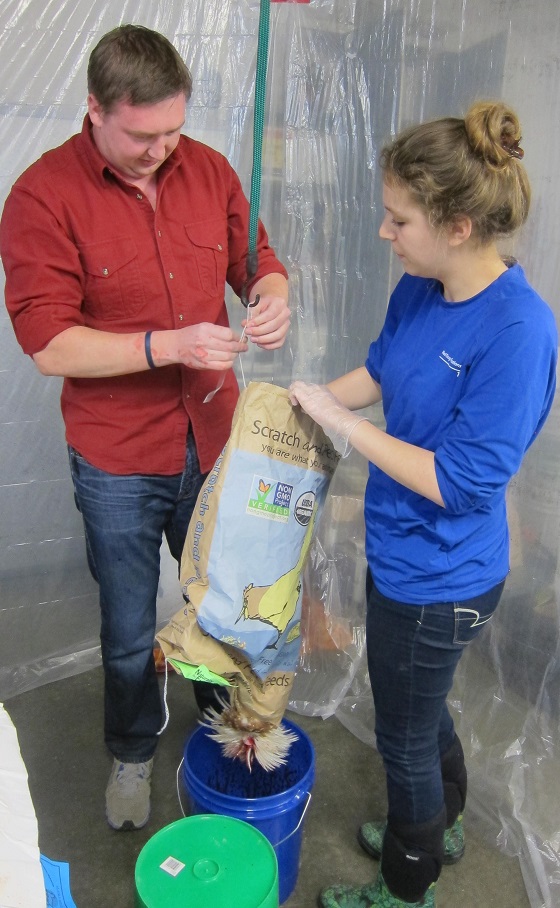
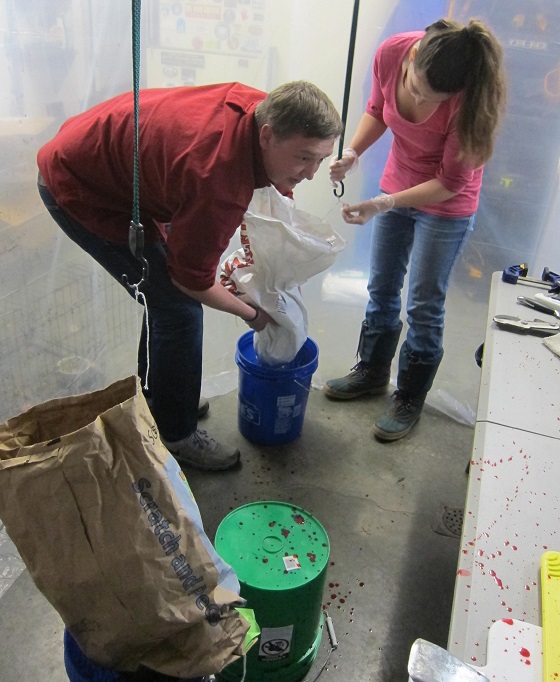
Right after the rooster’s head was cut, Sam & Rozz quickly moved the body over a bucket to catch blood, still holding on to the dead body as it flailed.
Once the body stopped moving, we clumsily attached a bungee cord to the garage ceiling so we could hang the rooster’s bag over the bucket to continue bleeding without needing to hold it anymore.
While the rooster was hanging upside down to bleed, I grabbed the hen to get her ready for the kill.
We repeated the same feed bag process with the hen. Rozz and Nora swapped places on holding the bag, and Sam remained in the kill position. (Nobody else felt ready to take over the executioner role.)
The hen’s neck sprayed blood as soon as her head was cut off. She was much messier than the rooster, actually squirting blood across to the other side of the garage painter’s plastic.
Nora held the dead hen’s body while it jerked around. Once the dead body stopped moving, she and Sam hooked up the bungee method to keep the headless body hanging over a 5-gallon bucket so it could bleed out while we started working on de-feathering the rooster.
Plucking the chickens
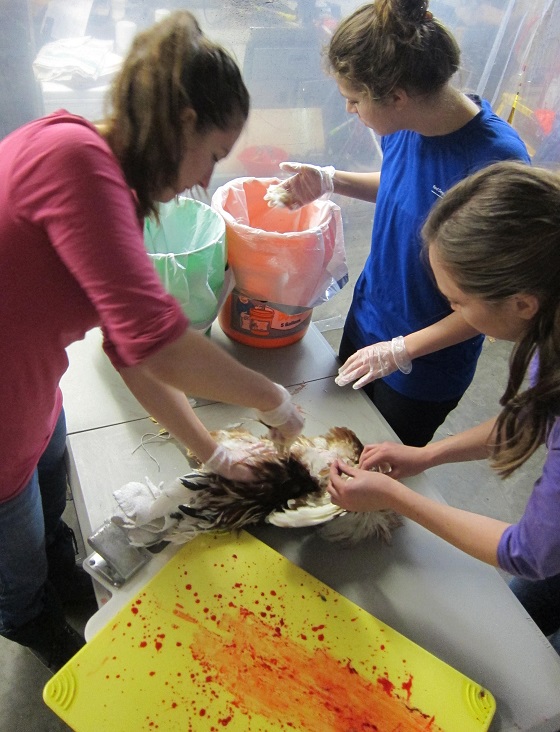
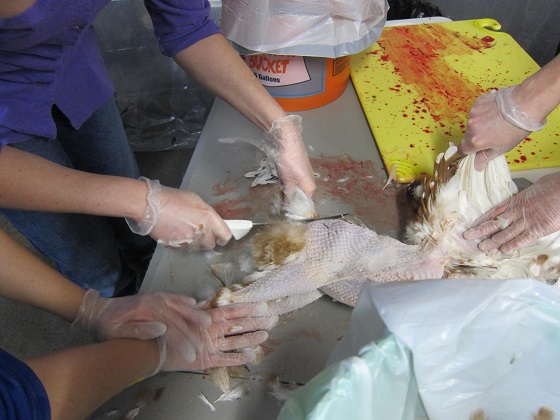
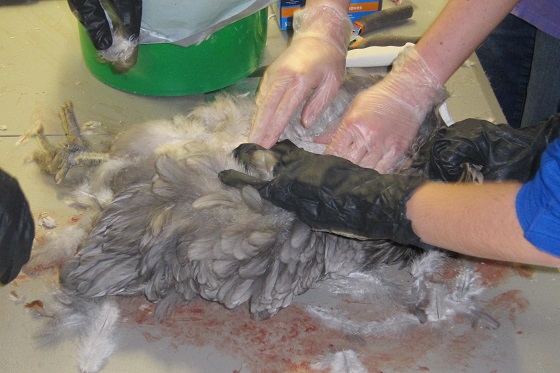
While the hen bled over a bucket, we started plucking the rooster. The body was still warm. It was uncomfortable getting used to plucking feathers out of a warm, soft body. It felt wrong…like we were hurting it, even though it was obviously dead.
Everyone in the group did research on how to butcher a chicken, and we all read from various sources that you’re supposed to have a big pot of scalding hot water to dunk the dead bird in before plucking.
We didn’t have a setup available for that in the garage, so before the butcher, we agreed that we’d try to pluck the birds without the hot water bath first If the plucking was too hard, we would skin the chickens instead.
As we started plucking, once we got used to the feel, it wasn’t that hard to get most of the feathers out. The other feathers that were hard to pluck were the thick feathers around the tips of the wings and near the tail/bum (especially the rooster tail).
We spread the chicken’s legs apart to pluck out the small, fluffy feathers that covered its rear. As we plucked patches of bare skin, we started to feel itchy and noticed something moving – actually, lots of small things moving. Small bugs, everywhere, crawling on the chicken and crawling up our hands and forearms.
At the time, we didn’t know what they were. After doing a lot of research on chicken bugs, we discovered they were poultry lice, and are fairly common on outdoor birds.
Although using a hot water bath on the chickens is mainly to help loosen the feathers to make plucking easier, it serves another purpose – to kill bugs. But we skipped the hot water bath.
Here’s a short video of the poultry lice crawling around on the freshly plucked rooster’s bum. In this video, I say I think they’re mites, but I was wrong. They’re poultry lice, not mites.
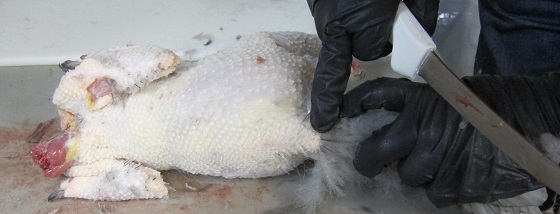
The rooster’s tail was all feathers, so instead of using a pliers to pluck out the tough, thicker feathers, we cut off the tail using a smaller knife. (“Small” meaning just smaller than our giant chopping, beheading knife.)
How to butcher a chicken – the cutting begins
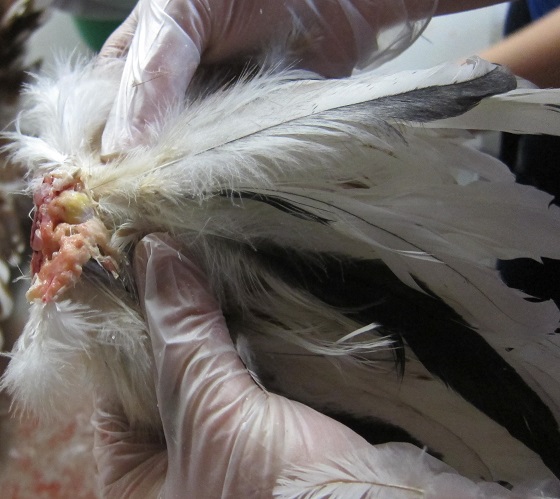
BE CAREFUL cutting off the chicken tail – chickens have an oil gland near their tail that you will want to remove before eating.
(You’ll notice that everyone now has gloves on, after discovering chicken lice crawling up our arms! We later learned that poultry lice can’t live on humans – we all survived and didn’t have issues later. It was just creepy at the time.)
Here’s a picture of the rooster oil gland (below). It’s the yellow bulbous part at the base of the tail feathers. It’s about the size of a pea.
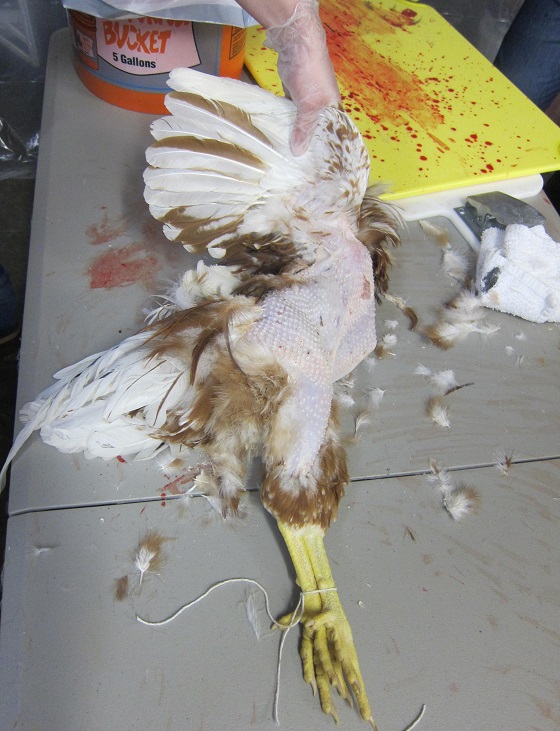
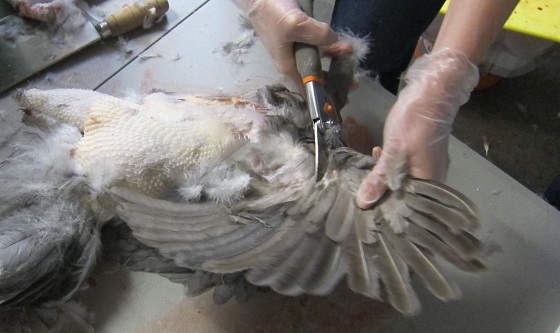
Next we moved onto the wings. The rooster’s wings were nearly all bone and feather. We assessed the amount of meat on the outer-most joint (the “tip” of the wings), and it wasn’t worth plucking. Instead, we used a garden clippers to cut the tip of the wings off.
Next we cut off the chicken feet. We didn’t pluck all of the tiny feather near the top of the feet, because we knew we would cut those off.
While we were doing a final detail pluck, Nora flipped the chicken on its side and put one hand firmly on its body cavity to hold it still. The chicken’s body let out a high pitched squeak noise that really startled us! She was able to recreate the noise by pressing on the body cavity again. We took a quick video of it, capturing the weird noise.
Once the chicken was beheaded, bled, plucked, and we cut off the tail (oil gland), wing tips, and feet, we were ready to start cutting into the body cavity for cleaning.
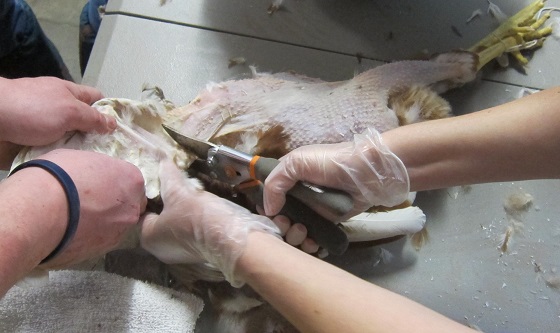
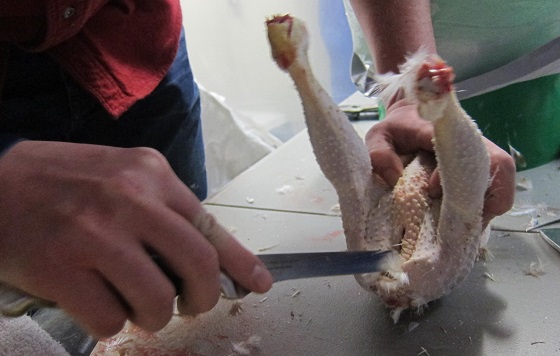
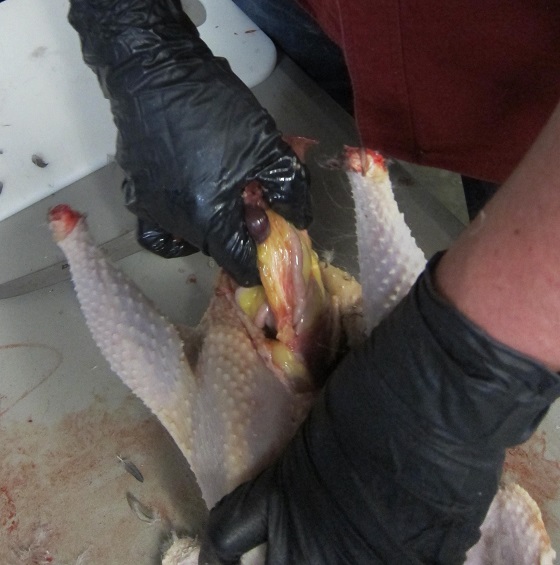
Sam made a careful and shallow incision on the backside, avoiding the intestinal tract. You don’t want to cut too close to the anus/vent until you can see inside the bird. If you cut the intestine, you spill poo goo on the meat.
Keep in mind that at this point, the bird will still be warm.
I tried putting my fingers inside to help Sam loosen the internal organs, but I couldn’t bring myself to do it. I’ve had my hand inside of plenty of cleaned turkeys and chickens from the grocery store, but they’ve always been cold from the refrigerator. Having my hand inside of an animal still warm from being freshly killed was a much different experience.
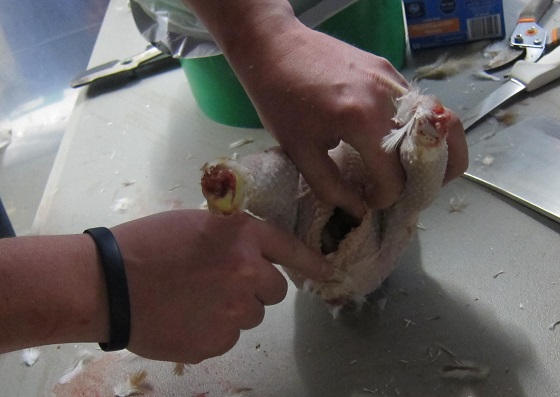
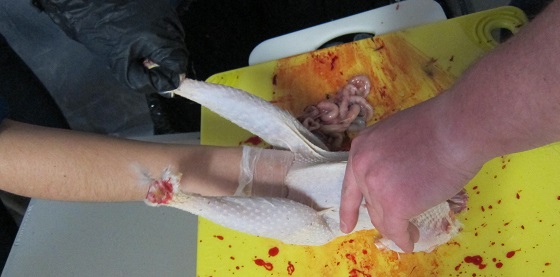
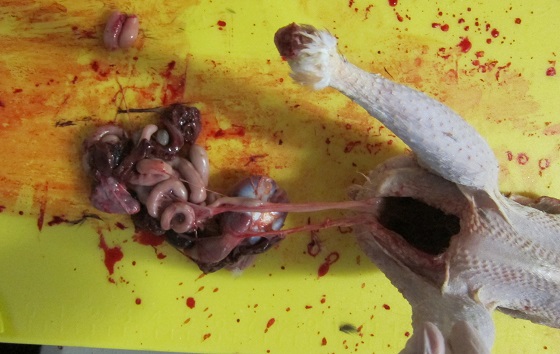
Once Sam got the body cavity opened wide enough to fit his hand, he moved his fingers around, gently loosening all of the internal organs, slowly pulling them out without applying too much pressure to avoid bursting them (especially the intestines).
This is the part of the butcher where I was thankful I didn’t let the chickens eat beforehand, otherwise it would’ve been more challenging if the intestines were full.
The last organs that were the toughest to get out were the lungs. They are pretty well attached to the rib cage near the spine. They’re dark blood red, and it’s ok if you need to get them off in pieces – there’s nothing inside of them that you’ll squish or burst.
When you really start to dig into the body cavity and pulling out organs, there’s a smell that we weren’t prepared for.
The best way to describe the smell is like if your dog ate rotten chicken, then threw it back up. I’m not usually a smell-sensitive person, but the team and I struggled with it for a few minutes.
The smell starts faint, and you as get deeper into the body cavity and start pulling out innards, it gets stronger and stronger. At first, we all thought someone in the group accidentally let loose a nasty fart, and we were all trying not to be rude and cover our noses. After we all realized the smell was just the dead, warm chicken, we all had good laugh.
“Well, if anyone ACTUALLY has to fart, now is the time,” someone said.
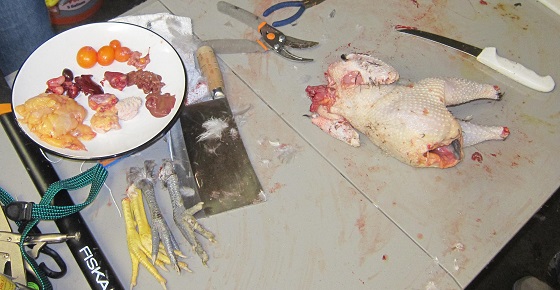
In the top left in the photo below are the rooster testicles. Apparently lots of people cook them up and eat them. I saved them for the dogs.
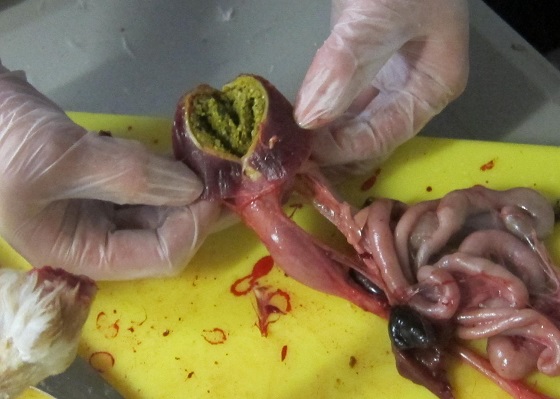
Here’s a picture of the gizzard. It’s strangely firm – pretty hard, actually. We cut it open, and the insides were really textured and mushy. I guess some people clean it out and eat it – fry it, bake it. I think I’d have a hard time eating it after seeing it and smelling it, though.
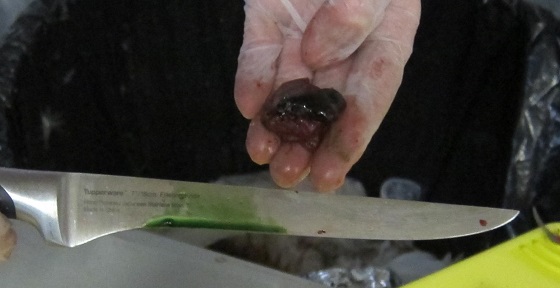
While I was playing surgeon and cutting open the gizzard out of curiosity, I accidentally punctured the chicken bile sack. You’ll know if you’ve cut the chicken’s bile sack because it leaks bright green liquid.
Luckily at this point it was already removed from the chicken itself, so none of the bile juice got onto the meat.
After we finished pulling the organs out of the rooster, we set the mostly clean carcass aside and started working on plucking the hen.
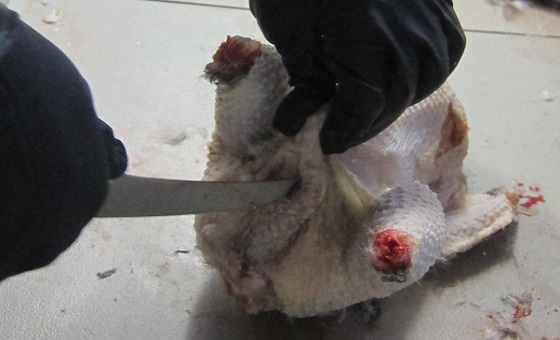
Just like the rooster, we used the garden cutters to cut off the feet. They worked pretty well.
We also used the garden trimmers to cut off the tips of the wings.
Since the plucking went pretty well without using the hot water bath, we decided to pluck the hen, too, instead of switching to skinning. The hen was a bigger bird and she had a lot more fat and meat than the skinny young rooster.
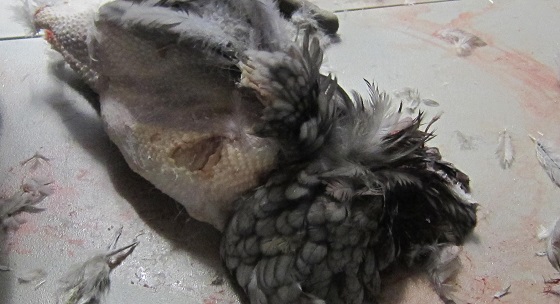
When we were plucking the hen, we had a few spots where we tried to pull out too many feathers at once too hard and ripped the skin. It wasn’t that big of a deal, and it was easy to recover from, but here’s what it looked like to break the chicken’s skin during plucking.
This photo is of the ripped skin over the chicken’s right breast (the fluffy feathers are the neck).
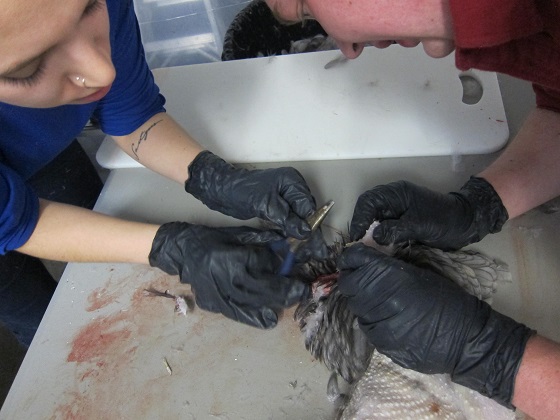
While plucking, there are a few spots where the feathers grow extremely thick and the base/stem is hard to pull out. Here’s a photo of Rozz using a pliers while Sam holds the bird.
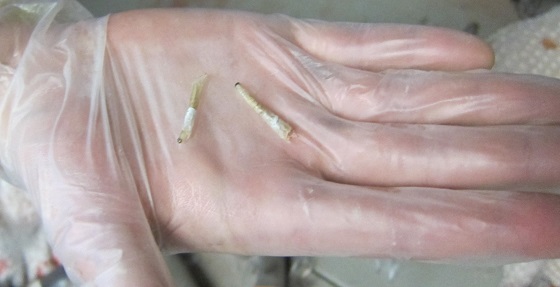
Here are some of the quill-like feathers that Rozz was able to pluck out using a needle posed pliers. These are the sort of feathers that are around the tail and tips of the wings, too. They’re very very hard to pull out, but these hard-to-pluck feathers are pretty much all located in areas that you wouldn’t be eating anyway.
After struggling to get out some of those really thick, deep-set feathers, we opted to cut off the hen’s tail.
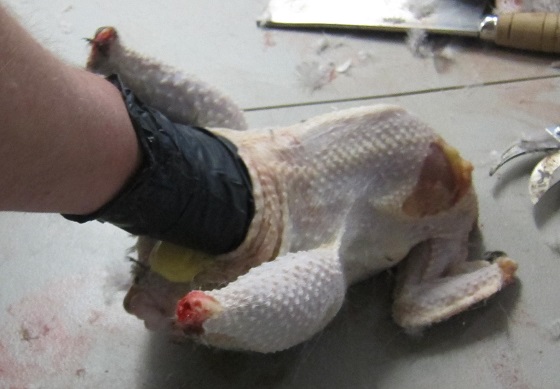
The gloves in the photo below are pointing to the bump where the chicken’s oil gland is. Even if you choose to pluck and leave the tail on the bird, that’s an area you want to cut out. When you look at it closer, it sort of looks like a pimple.
After removing the tail, Sam carefully cut into the body cavity.
Once there was a small hole cut, Sam reached his hand in and stretched it out. He gently moved his fingers around inside, carefully scraping against the inside of the chicken’s ribs and spine to loosen the organs.
Once he loosened the digestive system and other organs, he slowly pulled them out.
Since this hen was larger than the rooster, it was a little bit easier to get the organs out. There was more space to work with.
Once Sam pulled out most of the organs, he looked in the hen to see if there was anything left.
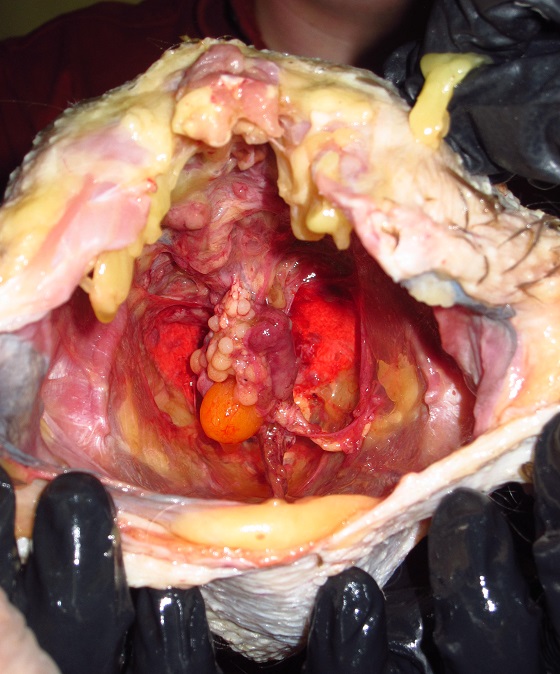
There sure was. The hen, being a female, was very different than the rooster. The ovaries (those small balls attached to the top of the body) were still hanging on inside of the body cavity.
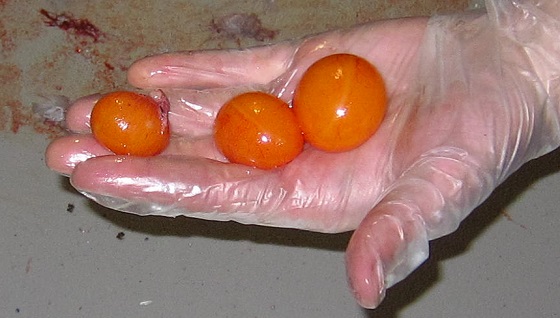
Here are the hen’s ovaries. There were just three of them this size. The rest were extremely small and non-colored. I saved these to cook up for the dogs.
I was curious and poked them with a fork, and they were gooey and runny inside and spilled open bright orange, just like you’d expect of a fully developed, raw egg yolk.
We took out a plate to collect “interesting” chicken parts that we didn’t want to eat, but would be good for the dogs.
It included the hen’s ovaries, the rooster’s testicles, the hearts, lungs, some neck fat and more. I cooked everything up on a skillet later, and the dogs were very happy.
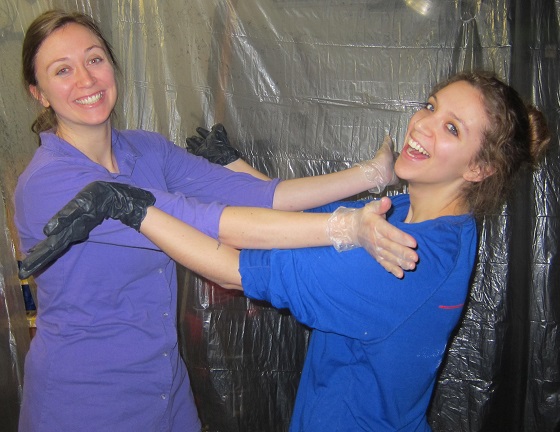
After finishing the butcher, Rozz and I were happy we made it through without any major emotional breakdowns. This is how you hug when your hands are covered in chicken blood and ovaries.
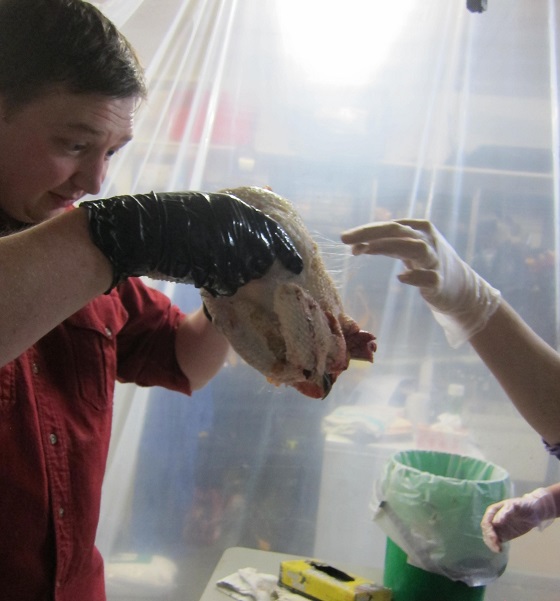
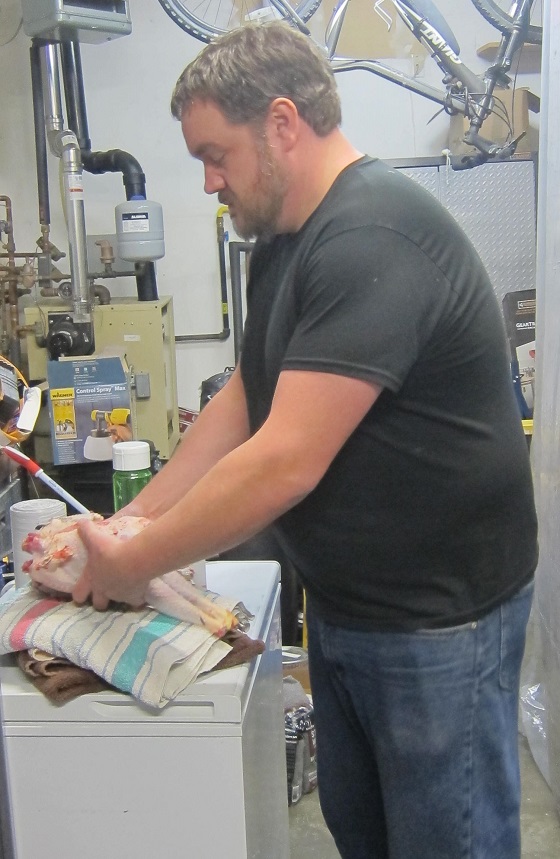
We washed off both of the butchered, cleaned chicken carcasses really well, and patted them dry with a clean towel. Sam washed his hands and took this photo of Drew drying them. (We needed some pictures of our photographer, Drew!)
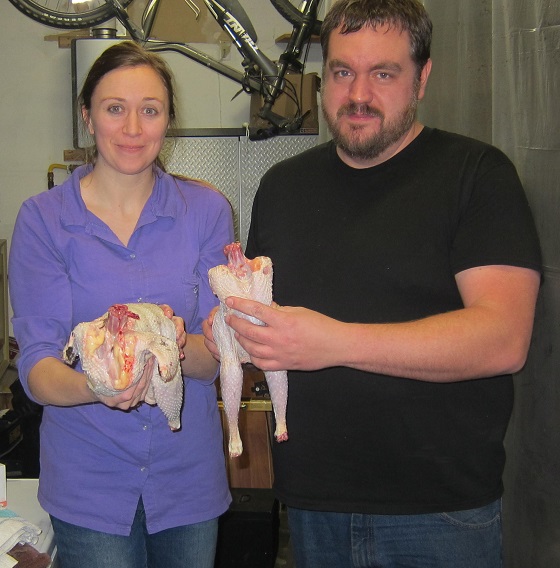
And here’s me & Drew holding the finished birds, ready for a baking pan. :)
Although I talked about things as they happened, it was a long post. Here’s a recap of things that someone new to butchering would want to know, because it’s not intuitive.
Things that I wasn’t expecting while butchering a chicken for the first time:
- The dead body flails around for about 30 seconds after cutting off the head. The body really has a surprising amount of movement immediately after the head is removed.
- Chickens have hairs. I didn’t notice the hairs as much while plucking, but once I brought the chicken carcasses inside the house and seasoned them, it was very noticeable. I ended up taking a lighter to the skin and quickly burning them off.
- Roosters have testicles; hens have ovaries. I know that sounds obvious, but seeing the ovaries inside of the hen’s body cavity (bright orange undeveloped chicken yolks) was a “wow” moment for me.
- Oil gland by the base of the tail. Cut it out.
- Hot water bath before plucking isn’t required. Most online resources don’t phrase the scalding water like it’s optional, but we did it without the hot water dunk. You don’t HAVE to boil before plucking. We did just fine without it!
- Skipping the hot water bath before plucking might mean crawlies. Outdoor birds get bugs, like poultry lice. It’s pretty common. If you forego the hot water dunk, and the chicken had mites or lice, those bugs will still be alive. They won’t hurt you, but some people are really bothered by bugs.
How I feel now, after butchering my first chicken
Even though I got light headed and had to sit down after watching the hen’s head get cut off, I made it through without crying and without gagging. I did it, and I feel good about it.
I feel a deeper appreciation for local farmers and a have gained a huge amount of respect for people who are able to raise their own animals for food. Most people don’t have the emotional strength that’s required to raise and care for the animals that they know they’ll some day have to slaughter and eat.
As people, we’re emotional. We would rather pretend that our $1 menu Big Mac never had a face, never had big brown eyes.
I’m not trying to make a political statement here; I’m rallying to bring the humanity back into our food, especially the food that came at the cost of life. It’s too easy to turn off the logical part of our brains that tell us if you don’t know where the meat came from and it’s cheap, the animal probably wasn’t given a respectable life or a respectable end.
It’s also far too easy to look at meat in the grocery store – the meat that’s perfectly shrink-wrapped in plastic packaging and sterile styrafoam – and think of it as just another product from a warehouse. But it’s not.
Eating meat in itself isn’t disrespectful. But eating meat in blissful ignorance is doing a disservice to yourself for not knowing where your food came from, and a disservice to the animal that gave its life.
I’m not saying that I’m perfect. Hunting and/or buying local meat is usually more expensive and way less convenient. But I’m trying to be more aware of it and do what I can, when I can.
I’ll step off my soapbox now and leave you with this warm fuzzy: I have some seriously amazing friends. I’m so grateful that they were there with me to experience the first time butchering a chicken. When I had my internal ‘WTF are you doing killing a chicken in your garage??” moments, being surrounded by good friends with a similar internal drive and respect made all the difference.
Other great chicken butchering resources
Last but not least, I owe credit where credit is due. If you’re interested in doing more research on how to kill and butcher a chicken on your own, here are the thoughtful, detailed articles that helped me tremendously:
We raised our first meat chickens this summer. We ended up butchering 10 chickens. It was a first for me too. The hubby had to be the one with the knife – I couldn’t quite bring myself to do it. But I was able to help and only a few tears were shed.
As someone doing this for the first time, I decided to watch a few YouTube videos first, just so I could see it first and be a little more prepared before we did it. I almost changed my mind at that point, but I knew as a new “homesteader,” I needed to do it. I’m glad I did and we’re thinking about raising more meat chickens this summer too.
We raised and butchered two turkeys for Thanksgiving and Christmas too. It was a bit harder, as turkeys have more personalities than the meat chickens did. (Or at least it seemed like it.) But I have to say, they were the best tasting turkeys I had ever had!
That’s great! You appreciate the meat so much more when you are more involved. Thank you for sharing. :)
This was just awesome and so helpful to read. It was emotional for me and hard at first when I saw those beautiful birds in the cage. It kind of broke my heart. But I’m really disturbed by how distant I am from the meat I eat. You just said everything I’ve been feeling about this so well. I’m going to share your post with my husband. We’re going to start with egg hens first, but someday I’d like to have some meat chickens. Thanks so much for sharing this.
Thank you so much, Carla. Even though most of us eat meat, butchering is such an emotional subject. It was a challenging post to write – I’m glad it could help someone else. :)
I think every one does this a little differently. A couple of things that I have found to be helpful are hypnotizing the chicken, so it just lies quietly in your arms and kitchen shears. they are great for removing the head, wing tips and legs. I like that I don’t have to try to balance a chicken and aim a high speed sharp weapon (knife at the same time) plus I feel terrible if I have to take a second chop. With the shears, it’s done in a big snip.
I also use them for cutting the chicken open to remove the guts.
I think next time I would try a shears for the head instead. The big knife seemed to take a lot of force. Thank you :)